Register beltpacks over-the-air (OTA)
1. Start registration (enable pairing mode)
Press the MENU button on the base and navigate to: Administration/Beltpacks/Over The Air/Start OTA. Press the rotary controller to start registration.
Show me. Click/touch image to enlarge 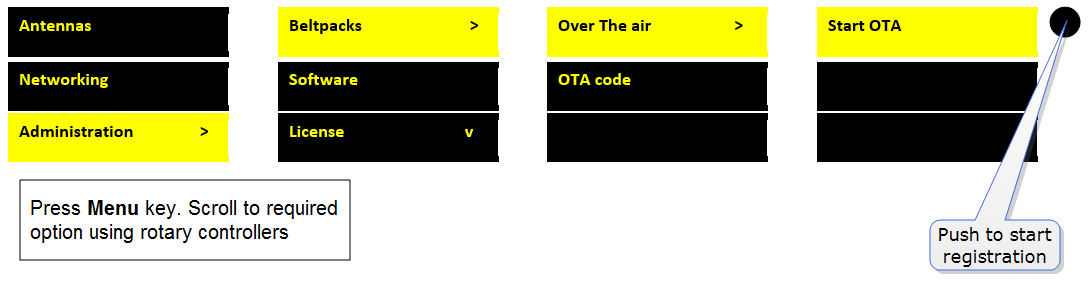
Connect to the CCM in a browser and navigate to Home/General/Wireless. Click the OTA button. 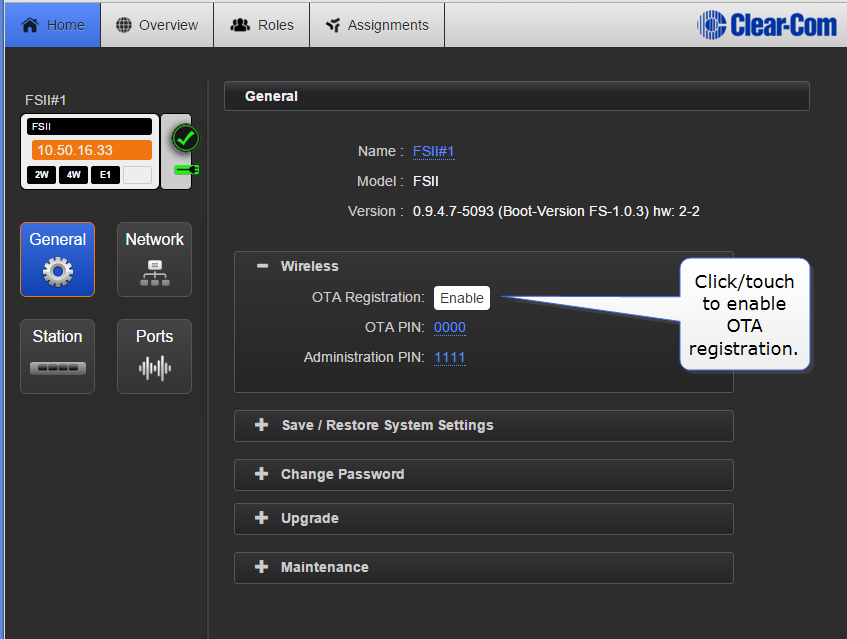
Note: Registration mode has a two minute inactive time-out. This is so several beltpacks can be registered sequentially without the user having to re-enable registration mode.
2. Register beltpack(s) OTA
Note: System = FreeSpeak II Base name.
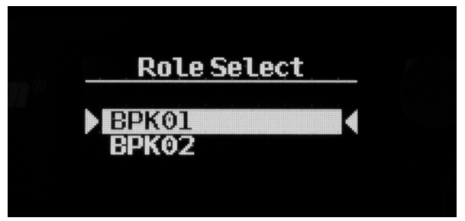
On the beltpack to be registered, hold the menu key for two seconds to enter MENU options. Scroll to SYSTEM CONNECT using the rotary controllers and select it using key D. In menu mode the D key on the beltpack operates as SELECT and the C key exits the menu level and cancels the selection.
Note: On a new system there will be no previous connections at this point. However, if the beltpack is currently connected to an active system, a confirmation screen will appear. Select Yes to connect to a new system or No to remain connected to the current system.
Available systems and previously registered systems will be visible on the beltpack menu screen.
To connect the beltpack to the system, the system must be visible (V) and in registration (pairing) mode. If the system is not in registration mode (P visible), registration should be re-started (Step 1).
Show me: 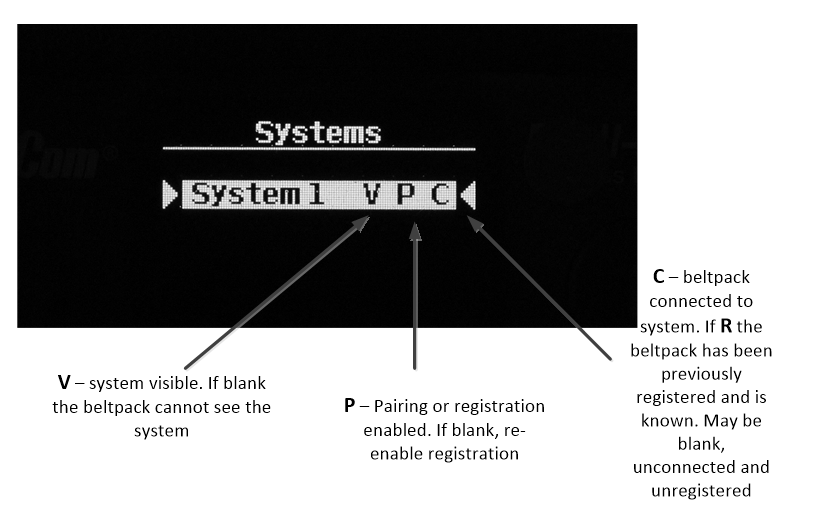
Connect the beltpack to the system using key D.
Enter the four digit pairing code for the system using both rotary controllers and the menu select key (D). The default code is 0000.
Note: The O.T.A. pin code is available from the Base Station menus and the CCM. See Administration/Beltpacks on the Base Station, Home/General/Wireless in the CCM.
(Key D = SELECT)
The timer to enable registration is now re-started so another beltpack can be registered if required (step 2).
The beltpack is now registered and ready for use. If required another beltpack can be registered (step 2). A Role is associated with the beltpack until it is changed (from the CCM, Base Station menus or the beltpack itself). See Roles.
Note: All system changes are live.
Related links: