Setting Up Virtual Client Users
Agent-IC and Station-IC Virtual Clients can be added to the Gen-IC Virtual Intercom system in two ways.
SkyPort Virtual Client User
Using this method the user is invited via the SkyPort Administration portal as a Virtual Client User to a workspace(s) containing the Gen-IC they wish to use. Invited Users receive an e-mail with Virtual Client download links and can, once installed, log into the Virtual Client using their e-mail address to retrieve a list of the Gen-IC they can connect to.
Gen-IC Locally Configured Virtual Client User
Using this method the user is manually created in the CCM of the Gen-IC, and DNS address, port number, username and password manually entered into the Virtual Client before connection.
Configuring Gen-IC Locally Configured Virtual Client User
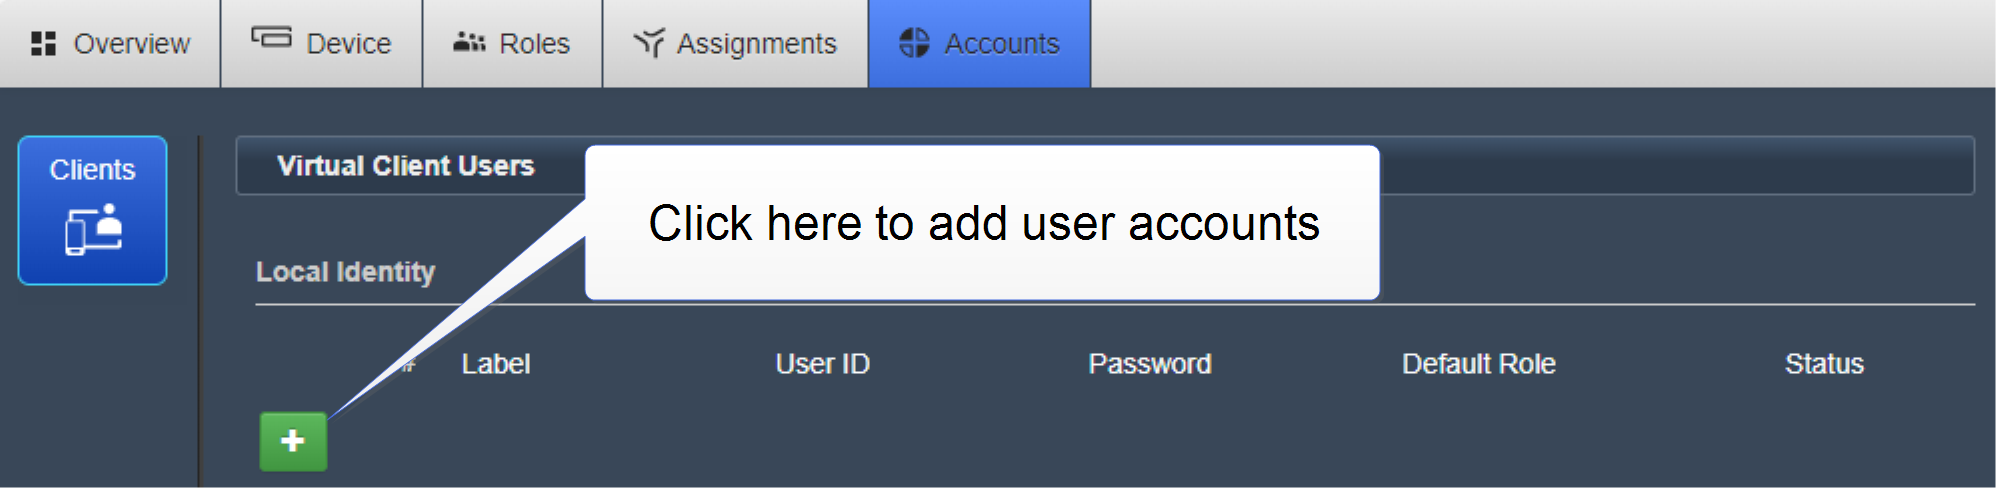
Navigate to Accounts.
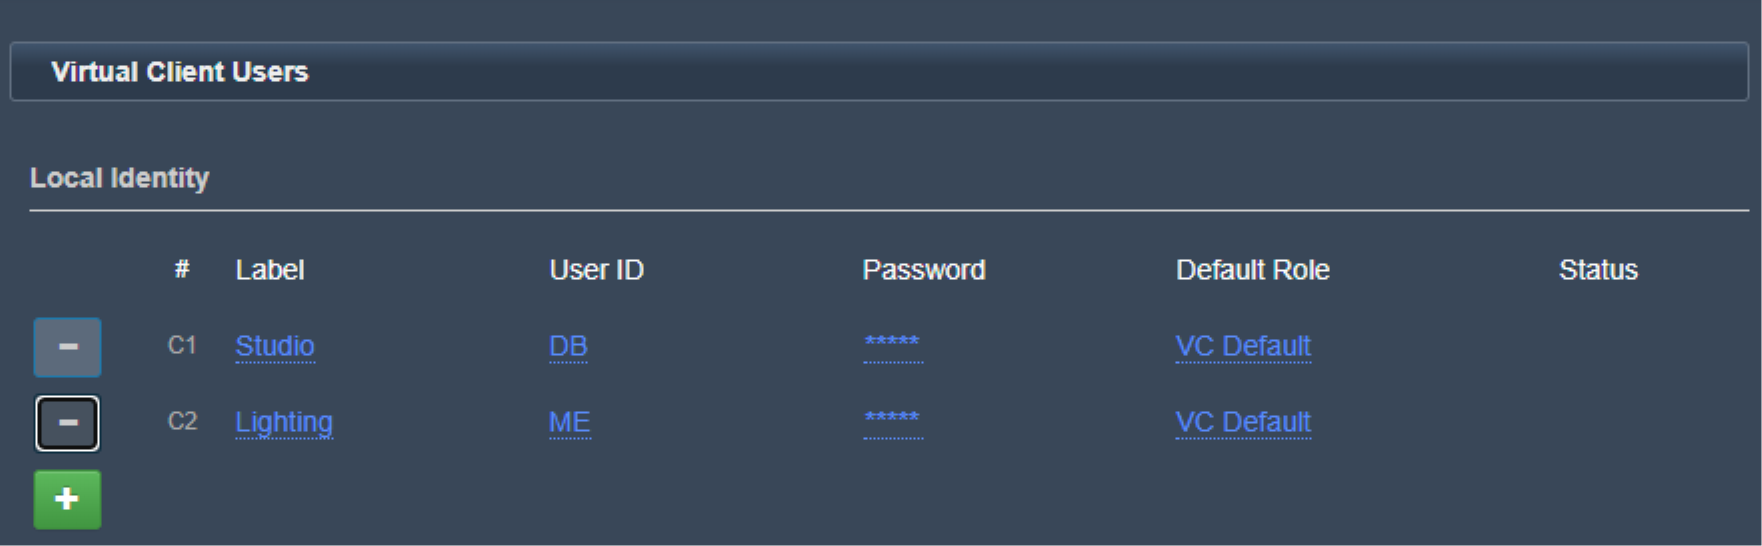
- Enter Label, User ID, Password and select a Role. An example is shown below.
You can now use Agent-IC or Station-IC to connect to your Gen-IC subscription.
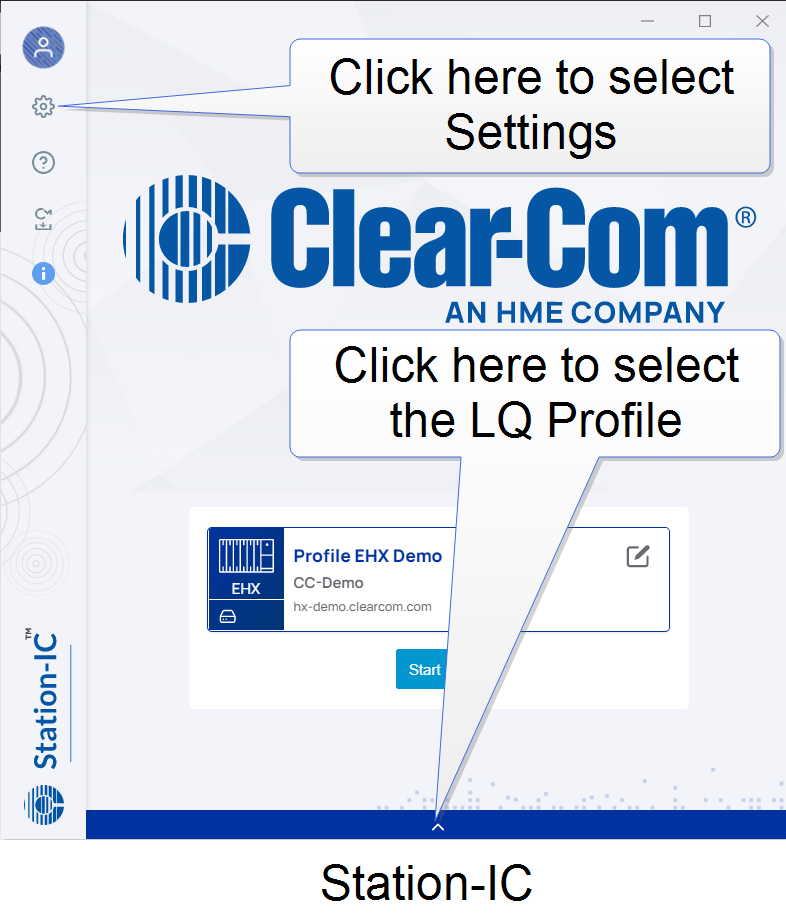
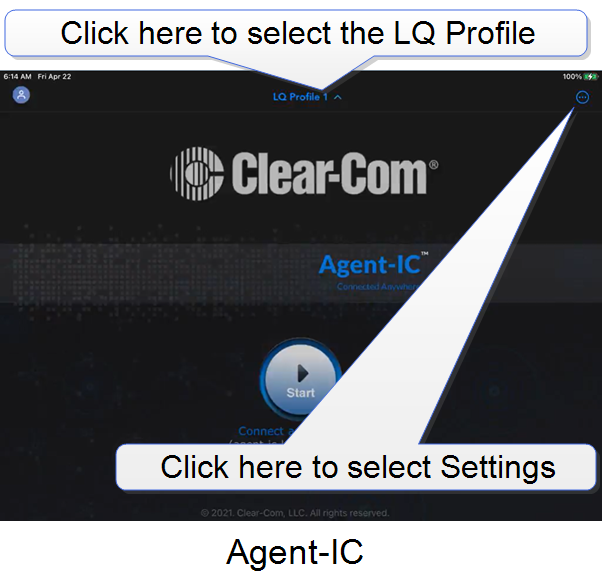
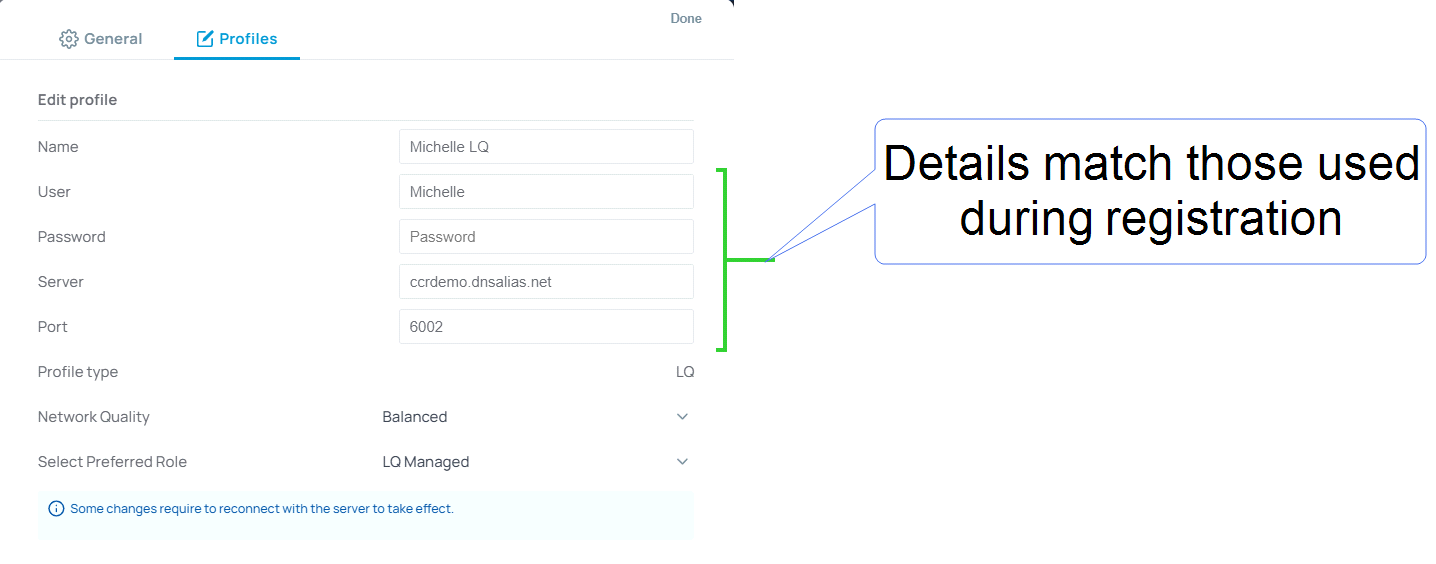
Open your Virtual Client, and select an LQ Profile.
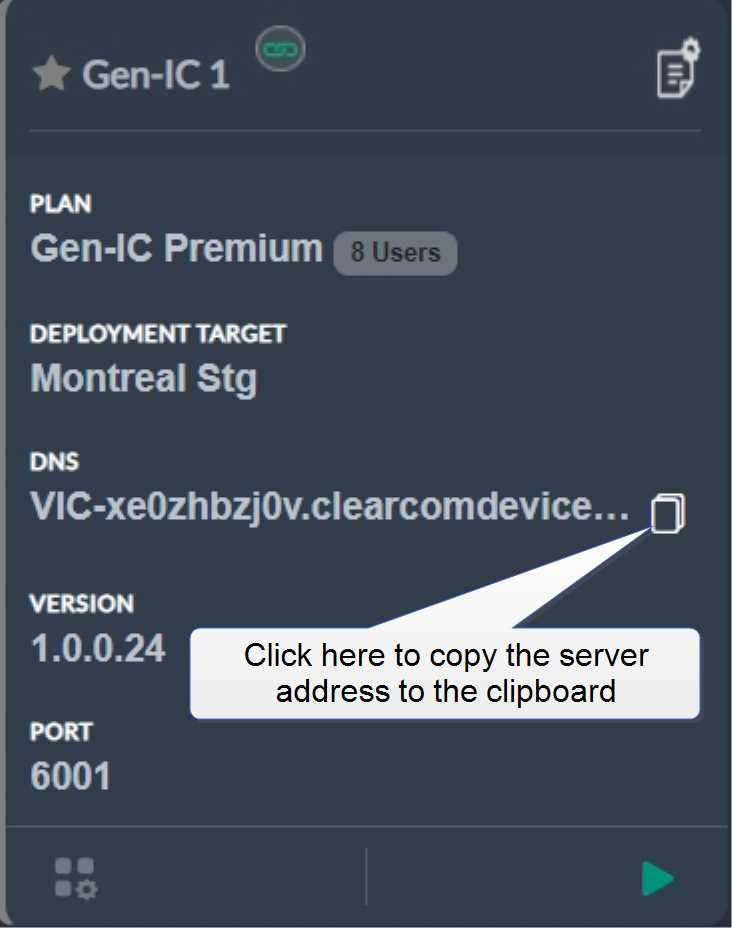
Enter the password, server address and port number from the SkyPort Portal
The DNS server address and port number are given in the SkyPort Portal.
Note: You can use the Copy icon to copy the server address and paste it into the Server Field of the Profile screen in the next step.
Click the cog icon to open the Profile page.
Your Station-IC or Agent-IC is now connected to the Gen-IC subscription. For more information about your Virtual Client, see the embedded Help documentation in Station-IC or Agent-IC.
Navigate to the Assignments page. Here, you can set channel names and associate LQ interface ports, if applicable.
Navigate to the Roles page. Here, you can configure channel and keysets for your virtual client.