Intelligent Linking with PiCo-Link
| Notes: | You can create a high capacity CAT-5 connection between two Eclipse HX-PiCo matrix frames using the PiCo-Link connector on each device. Hopping is not supported. |
| The last four ports on an Eclipse HX-PiCo matrix frame are four-wire ports, and not available for panel connections, and are recommended as 4-wire trunks to other matrices. | |
| Clear-Com recommends that you do not add other ports apart from the 4-W port to the 4-W trunk port on the matrix and the IVC-32 port that connects to the LQ trunk port on the other matrix. Otherwise, the intelligent link may contain undesired audio. |
The 36 ports of the first matrix frame are intelligently linked to the 36 ports of the second, creating a 72-port non-blocking system.
You can create one non-blocking 72 port Eclipse HX system by connecting two Eclipse HX-PiCo matrix frames (matrices) together, using the PiCo-Link RJ-45 connectors on the matrices.
To make this connection, use a specially constructed screened CAT-5 cable of maximum length 1 meter (3.28 feet). The cable is wired as shown below:
|
Cable end 1 |
Wire color |
Cable end 2 |
|---|---|---|
|
Pin 1 |
White / orange |
Pin 3 |
|
Pin 2 |
Orange |
Pin 6 |
|
Pin 3 |
White / green |
Pin 1 |
|
Pin 4 |
Blue |
Pin 4 |
|
Pin 5 |
White / blue |
Pin 5 |
|
Pin 6 |
Green |
Pin 2 |
|
Pin 7 |
White / brown |
Pin 7 |
To transfer data between two linked Eclipse HX-PiCo matrices using the PiCo-Link also requires that the Ethernet ports are connected with either a cross-over shielded CAT-5 cable or a switch using conventional shielded CAT-5 cable.
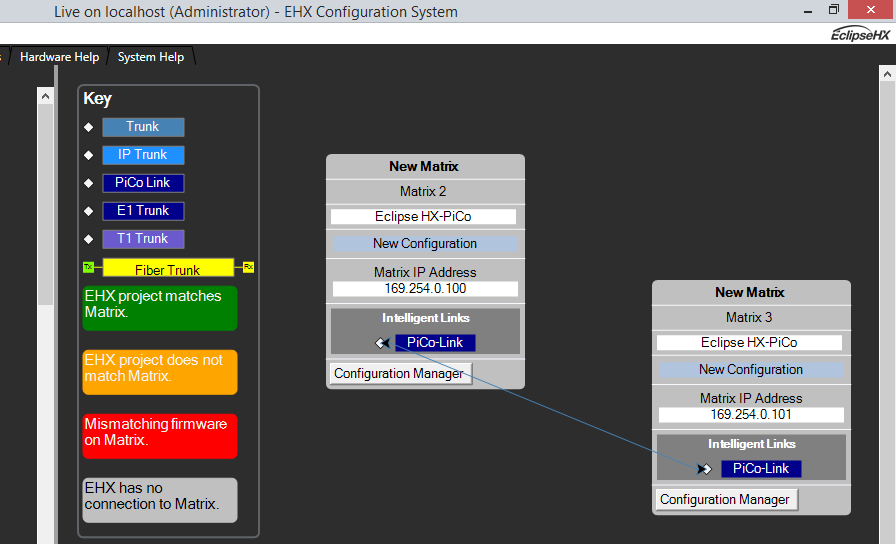
Setting up a Pico link
To set up a Pico link:
-
In the Layout screen, for each Pico matrix, select Hardware > Cards and Ports > PiCo-Link.

-
In the drop-down list, select PiCo-Link.
-
In the Layout screen, using the mouse drag a link from one Pico matrix to the one you need to link to.
If you want to disable the link:
- On the Layout screen, click on the link connecting the two Pico matrices and press Delete.