FreeSpeak II® (FS II) Beltpacks
Registering Beltpacks
Before a beltpack works, it must be registered to the system. There are two ways to do this:
-
By using a USB connection between the beltpack and the computer hosting the EHX software
-
By using Over The Air (OTA) registration.
Registering beltpacks using a USB cable
-
Select Hardware > Cards and Ports, and then add an E-Que FS II-TA Antenna or an E-Que FS II-TA Splitter card.
-
Turn the beltpack on.
-
Connect the beltpack to a USB port on the computer.
-
From the Hardware menu, select Beltpacks.
-
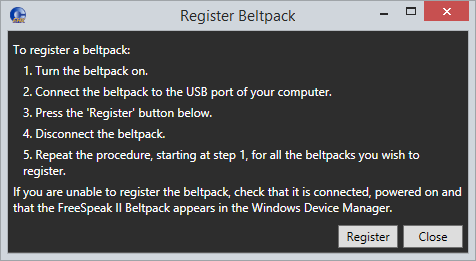
Click Register Beltpack. The following screen appears containing a list of instructions.
-
Click Register.
Registering beltpacks over the air
Over the Air (OTA) must be enabled before you can register a beltpack over the air.
You can do this either from the EHX software or from a beltpack that is already registered and has basic menu access or higher with the required admin code. For information about enabling OTA registration from a beltpack, see the Enabling OTA Registration from a Beltpack section of the FreeSpeak II User Manual.
To enable OTA from the EHX software:
-
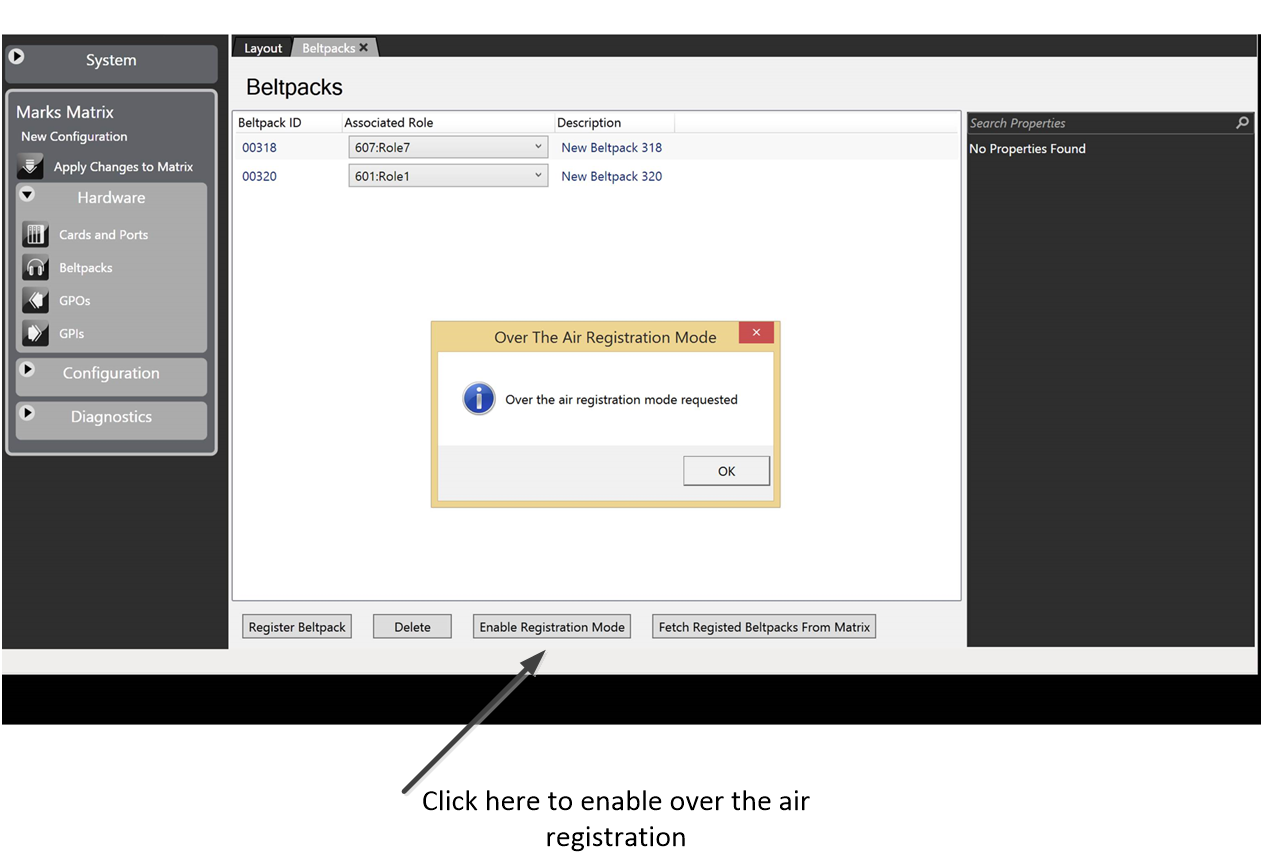
From the Hardware menu, select Beltpacks.
Note: Beltpacks can be registered before they have a role. However, until they have a role assigned to them they cannot be logged in to the system. So it is a good idea to have roles for beltpacks assigned before registration. You may wish to register more beltpacks than you have roles for, to allow for spare beltpacks.
-
Click Enable Registration Mode.
This opens registration or pairing mode for two minutes.
-
Once OTA registration is enabled it will be necessary to follow the OTA registration sequence from the beltpack to be registered.
-
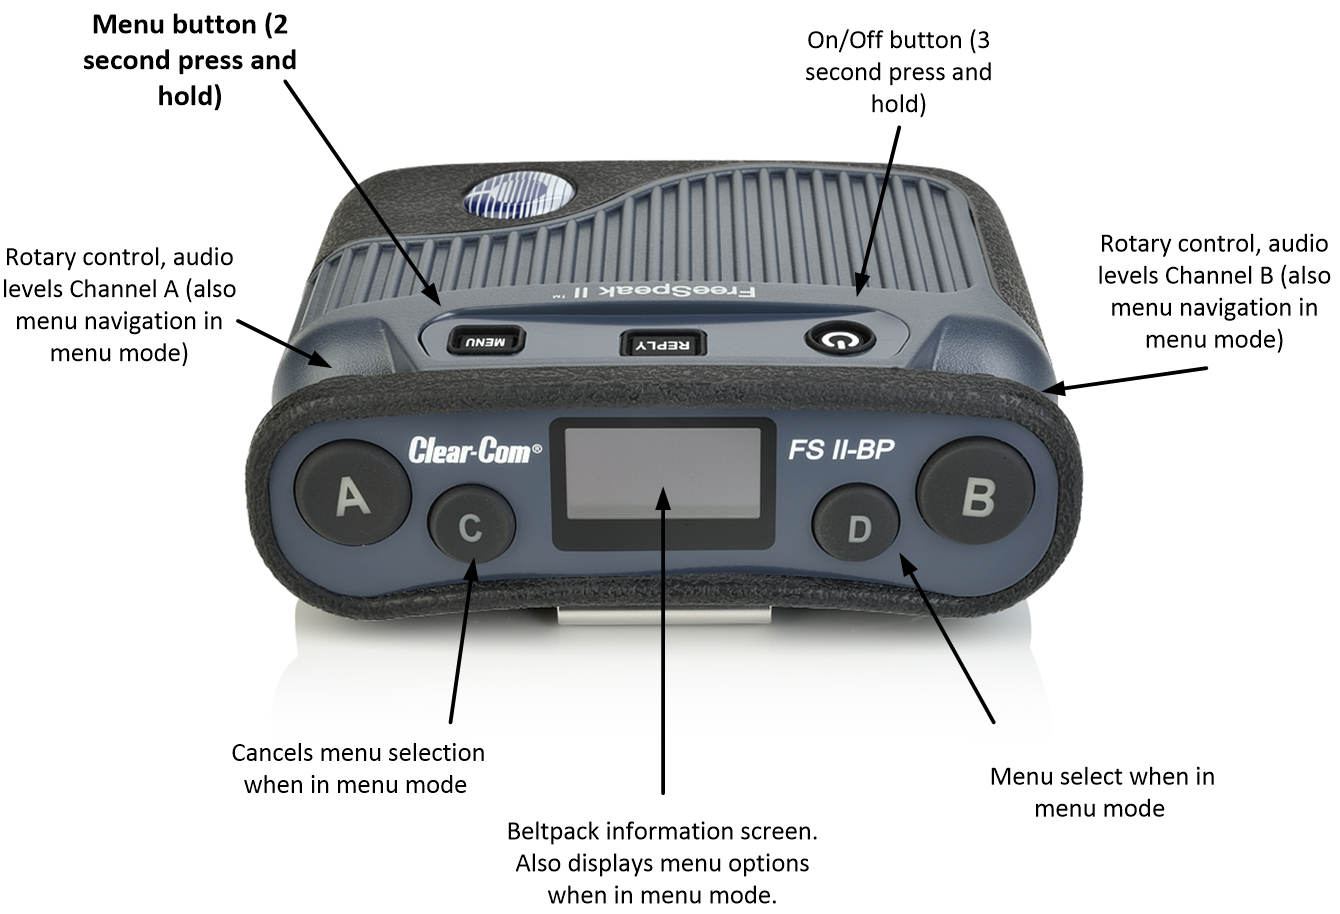
Power on the beltpack.
-
On the beltpack to be registered, hold the menu key for two seconds to enter MENU options. Scroll to SYSTEM CONNECT using the rotary controllers and select it using key D. In menu mode the D key on the beltpack operates as SELECT and the C key exits the menu level and cancels the selection.
Note: On a new system there will be no previous connections at this point. However, if the beltpack has been connected previously, a confirmation screen will appear. Select Yes to connect to a new system or No to remain connected to the current system.
-
Available systems will be visible on the beltpack menu screen.
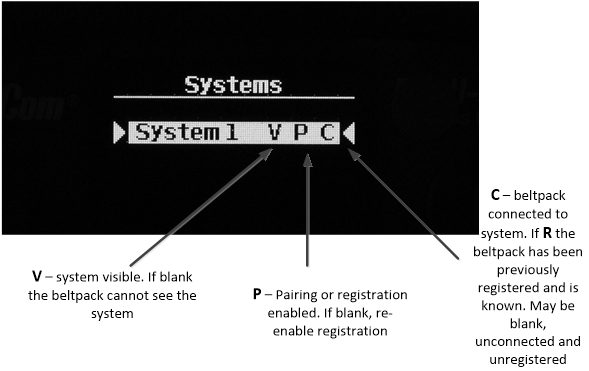
To connect the beltpack to the system, the system must be
-
Visible (V) and
-
In registration (pairing) mode (P) on the beltpack screen.
If the system is not in registration mode (P is not visible), registration should be re-enabled on the matrix using the EHX screen.
Note: If a beltpack is connected to a system, ‘C’ will be visible in this screen. If a beltpack is not currently connected but has been in the past, ‘R’ will be visible. This shows that the beltpack has been previously registered with the system which will recognize it.
-
Scroll to the system you want and press D (menu select) on the beltpack.
-
You will be presented with a PIN code screen. Enter the four-digit pairing code for the system using both rotary controllers and the menu select key (D). The default code is 0000. Use the right-hand controller (A) to scroll through numbers 0-9 and the left-hand controller (B) to move through the square number boxes.
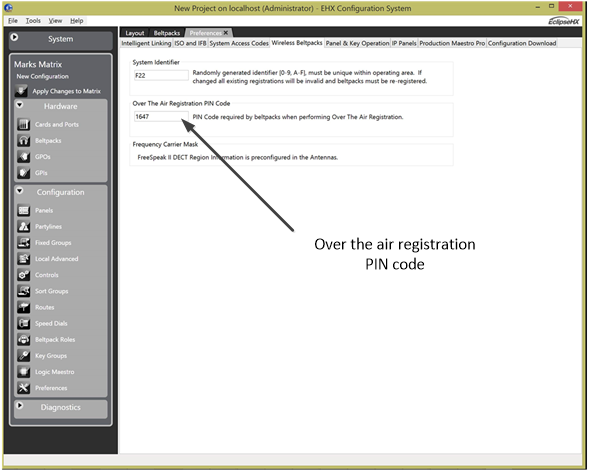
Note: To change the OTA registration pin code, go to: Configuration > Preferences > Wireless Beltpacks.
-
After entering the correct pairing code on the beltpack screen, select D, and then select an available role from the list displayed.
-
The beltpack is now registered and ready for operation.
-
If required, the next beltpack can now be registered (Step 2).