FreeSpeak II™ Beltpack Programming
You can use the Panels configuration screen to configure beltpack roles to determine how they behave. For example, you can assign labels to keys and set beltpack operating parameters. The beltpack is treated as if it were a panel, allowing you to drag and drop labels onto keys. To program a beltpack:
-
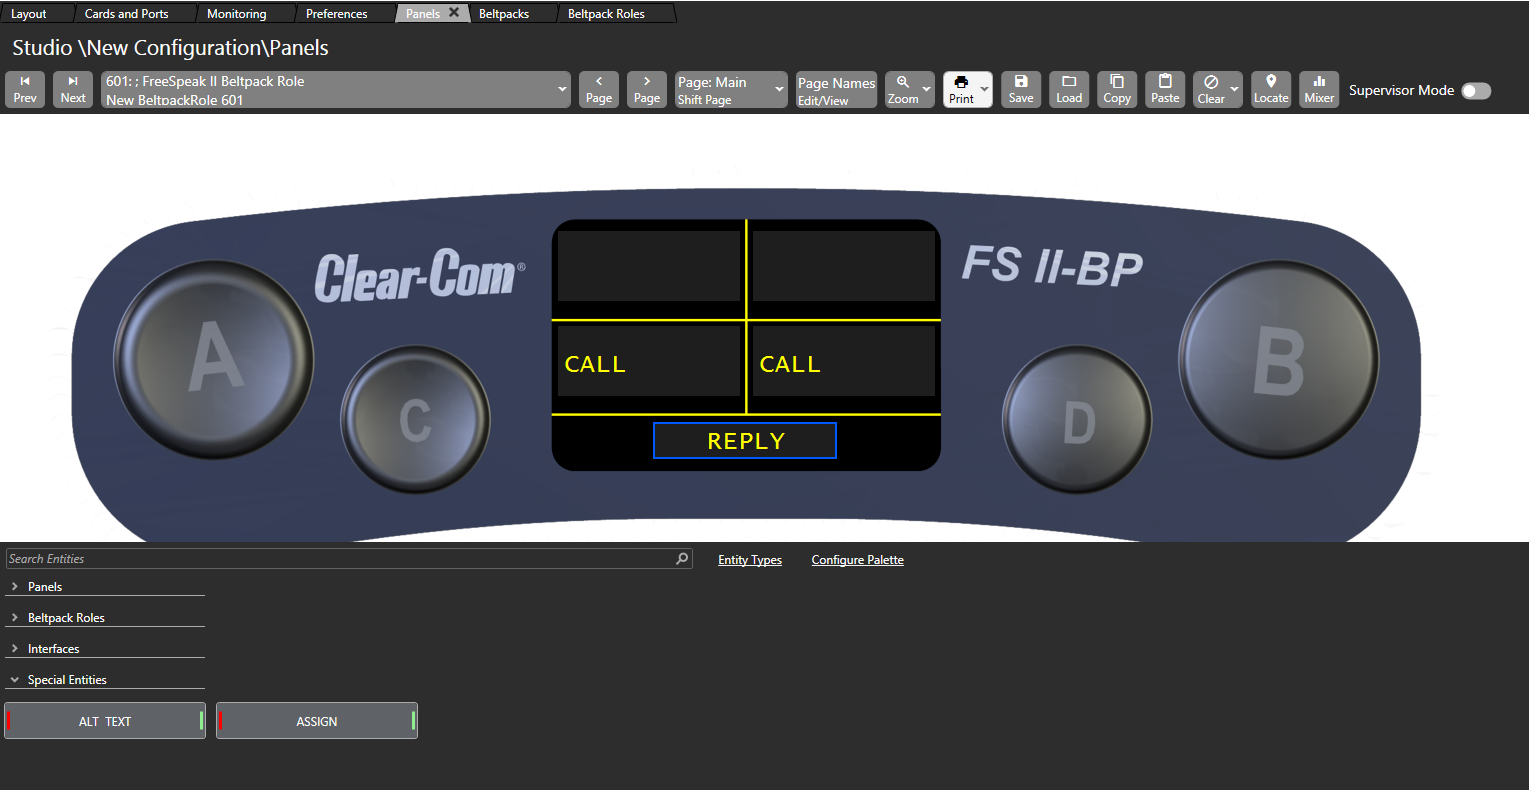
Select Configuration > Panels. The Beltpack Programming screen appears.
-
From the drop-down list at the top-left of the screen, select the required beltpack.
-
Drag and drop labels from the bottom of the screen onto the required beltpack keys. Buttons A, B, C, D and the Reply Key can be assigned.
Note: When the cursor hovers over a key, the status of the key is displayed showing the key number and the key type.
-
Right-click a key to open a key configuration menu allowing you to configure the key type, local assignment, interlock group and latch disable.
Activation
Use this option to determine how the key behaves when activated with the pushbutton
-
Right-click the required key to display the options menu, and then select Activation.
-
Select from the following options:
-
Talk - sets a talk from the beltpack to a destination with no automatic listen to the destination
-
Listen - sets a key to listen to the source without talking to the destination at the same time. Use the rotary control to increase listen level.
-
Talk and Listen - sets a talk key with listen Use the rotary control to increase listen level.
-
Talk and Forced Listen - sets a talk key with permanently made listen Use the rotary control to increase listen level.
-
Dual Talk and Listen - sets a dual talk and listen key. This makes the pushbutton activate a talk and listen on a press and hold or latch a Listen with a short press and release on the same pushbutton.
Local assignment
Use this option to enable or disable local key assignment.
-
Right-click the required key to display the options menu, and then select Local Assignment.
-
Select between:
-
Allow Local Assignment
-
Disallow Local Assignment
Interlock group
Use this option to assign several keys on a beltpack into a selector group and restrict the group so that only one key of the group can be activated at any one time. This function only refers to talk paths.
For example, if a beltpack has three keys programmed to talk to cameras 1 to 3 then by setting these into an interlocked group only one camera key can be selected at a time.
You can assign any or all beltpack keys to nine available interlocked groups.
To add a key to an interlocked group
-
Right-click the required key to display the options menu, and then select Interlock Group. A list of Interlock Group options appears.
-
Select the required interlock group or None if the key is not to be in any interlock group. The key interlock groups appear in the key information popup shown when the cursor hovers over a key.
Note: You can also add the key to other interlock groups.
Local advanced latching
Use this option to set key latching:
-
Right-click the required key to display the options menu, and then select Local Advanced Latching .
-
Select On,Off or Always Latch.
| Latch Option | Effect |
|---|---|
| ON (Default) | A quick tap on a key will latch audio on and off. A long press will activate audio only for the duration of the key press. |
| OFF | The key will not latch, a long press will activate audio for the duration of the key press. |
| Always Latch | The key will latch on and off on any key press, long or short. |
Go to key destination
Use this option to display the Matrix Hardware Editor screen with the destination the key refers to highlighted. Right-click the required key to display the options menu, and then select Go to Key Destination.
Delete key
Use this option to remove a key label. Right-click the required key to display the options menu, and then select Delete.