Using Dante Systems
To configure Dante you must be familiar with the Audinate Dante Controller, available from the Audinate website.
Before configuring the connection in the Dante Controller, you must determine which of the 4 RJ45 LAN connectors on the Arcadia Station you wish to use for Dante network traffic.
| Note: | The PC running the Audinate Dante Controller must also be connected to the Dante network. |
| Note: | The Dante connection on the Station supports both Dante and Dante (AES67). |
Determining which LAN connector you wish to use for Dante must be done in the CCM. Navigate to Hardware > Host . Under the Network tab, select the port for Dante. This port will default to a DHCP setting. If you wish to configure a static IP address you must do this in the Dante controller.

| Note: | LAN 3 and 4 are for use with an SFP module (either fiber or RJ45 ). |
| Note: | You must have sufficient licensed ports; each Dante channel consumes one licensed port. See Licensed Ports under Configuring System Resources. |
LAN connectors can be configured in any way you wish, but the CCM enforces that you MUST NOT configure IP transceivers (AES67) and Dante traffic on the same network. This is because AES67 network traffic has higher timing requirements than Dante network traffic, due to the need for IP transceivers to achieve DECT synchronization.
When configuring Dante connections, the Dante subsystem IP configuration is determined by the Dante Controller.
-
In the CCM, navigate to Hardware > Host > Network and configure Dante on the LAN connector you wish to use for Dante connections.
-
Connect a cable (Cat5/6e or fiber) to the LAN connector that is designated for Dante. Connect the other end to a switch on your Dante network.
-
Open the Dante Controller and check that the network interface details are correct.

-
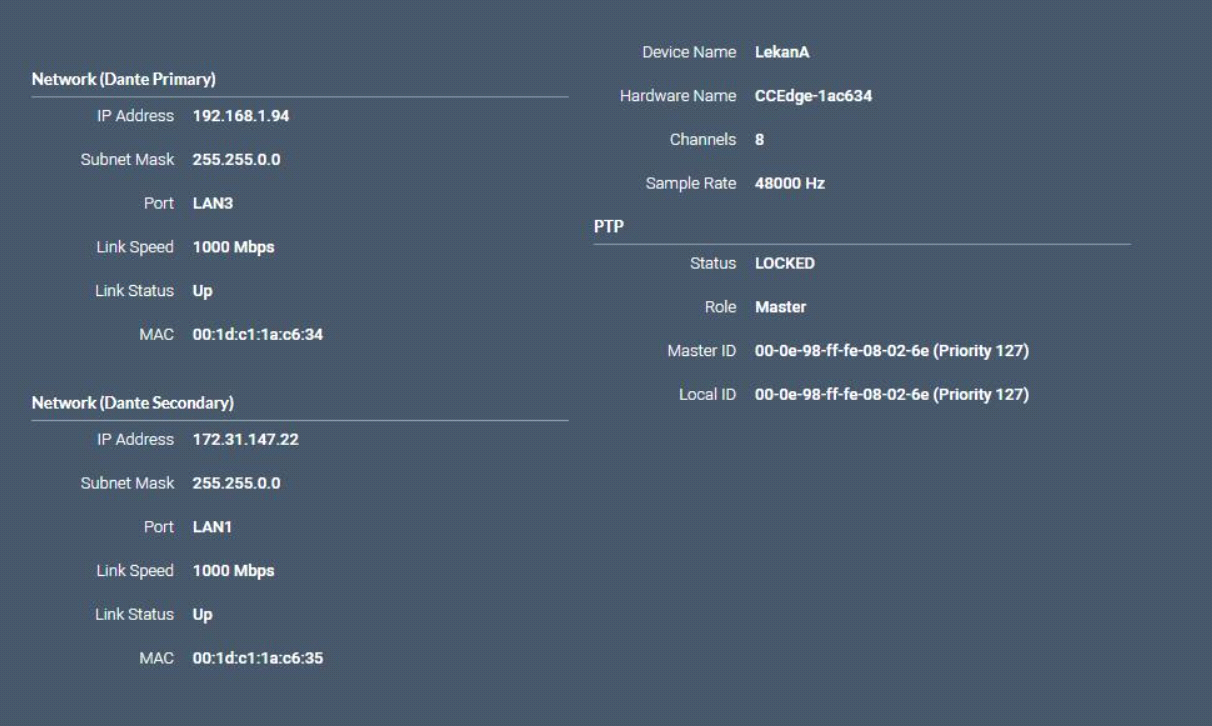
Check network and connection details under the Status tab in the CCM.
-
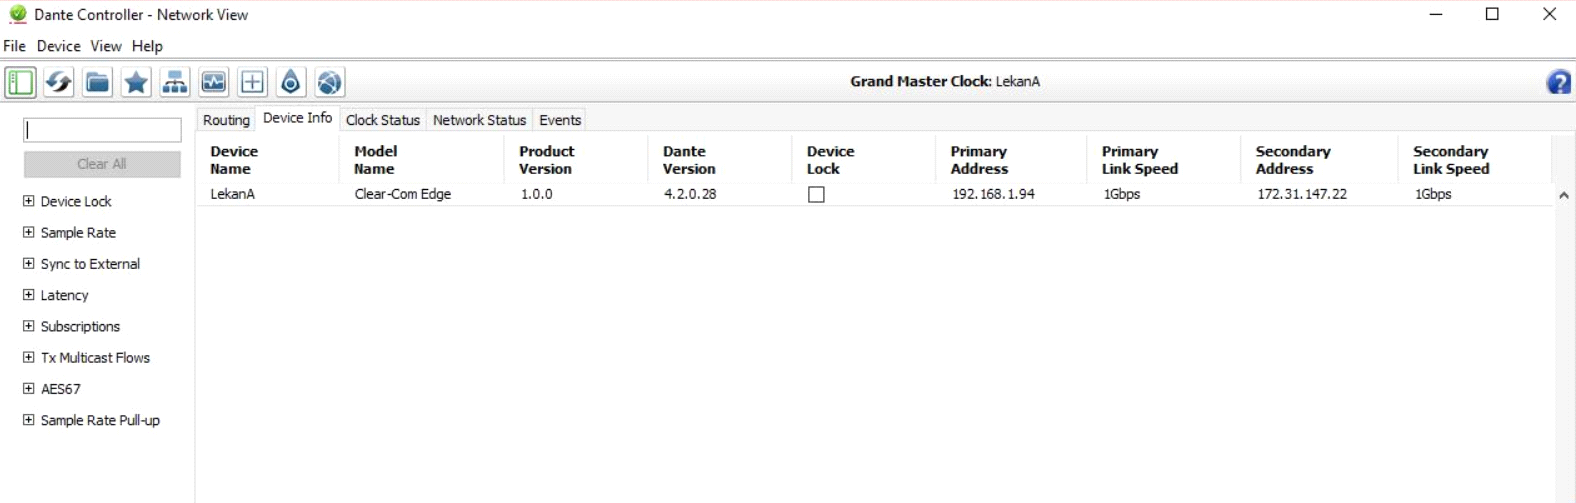
Details can also be viewed in the Dante Controller.
-
In the CCM navigate to Hardware>Resources>Dante Ports and add Dante ports. Give the new ports a suitable label.

-
Route the channels as required in the Dante Controller.
-
You will see available Dante ports in the Configuration page of the CCM. These ports can be assigned to channels on the Arcadia Station in the usual way.
-
Select the required channel click the + icon next to the port.
